

Exercise Daily – Foam rolling has gained significant popularity in recent years regarding relieving muscle soreness and enhancing workout recovery. This simple yet effective technique, often called “foam rolling 101,” involves applying a cylindrical foam roller to pressure specific muscle groups, promoting muscle relaxation and reducing pain. The effects of foam rolling are numerous, including alleviating muscle knots, reducing delayed onset muscle soreness (DOMS), and aiding in the recovery of muscle fibers.
Using a foam roller can increase blood flow and enhance the flexibility of muscles and fascia, leading to quicker recovery times. Whether using a softer foam roller for gentle pressure or a firmer one for deeper muscle penetration, incorporating foam rolling as a recovery tool can significantly improve your post-workout experience.
Foam Rolling
Foam rolling is a self-myofascial release technique that uses a foam roller to apply pressure to targeted muscle groups. The foam roller is a cylindrical tool made of dense foam, and it can vary in size and firmness. By rolling over different muscle groups, you can help release tension, reduce muscle tightness, and increase blood circulation in the area. Foam rolling is often used as a warm-up or cool-down activity to improve muscle recovery and prevent injury.
Benefits of Foam Rolling
The benefits of foam rolling extend beyond relieving muscle soreness. Let’s explore some of the key advantages:
- Muscle Recovery: Foam rolling can help you recover faster by increasing muscle blood flow and reducing inflammation. This aids in removing metabolic waste products that contribute to muscle soreness.
- Improved Flexibility: Regular foam rolling can help improve your range of motion by breaking up muscle adhesions and scar tissue. It also helps to lengthen and relax tight muscles.
- Injury Prevention: By addressing muscle imbalances and reducing tightness, foam rolling can help prevent injuries during physical activities and workouts.
- Reduced Pain Perception: Foam rolling stimulates the sensory receptors in your muscles, providing a temporary analgesic effect. This can help reduce pain sensitivity and discomfort.
- Enhanced Performance: Incorporating foam rolling into your warm-up routine can increase muscle activation and prepare your body for more efficient movement, leading to enhanced performance.
Foam Roller Exercises
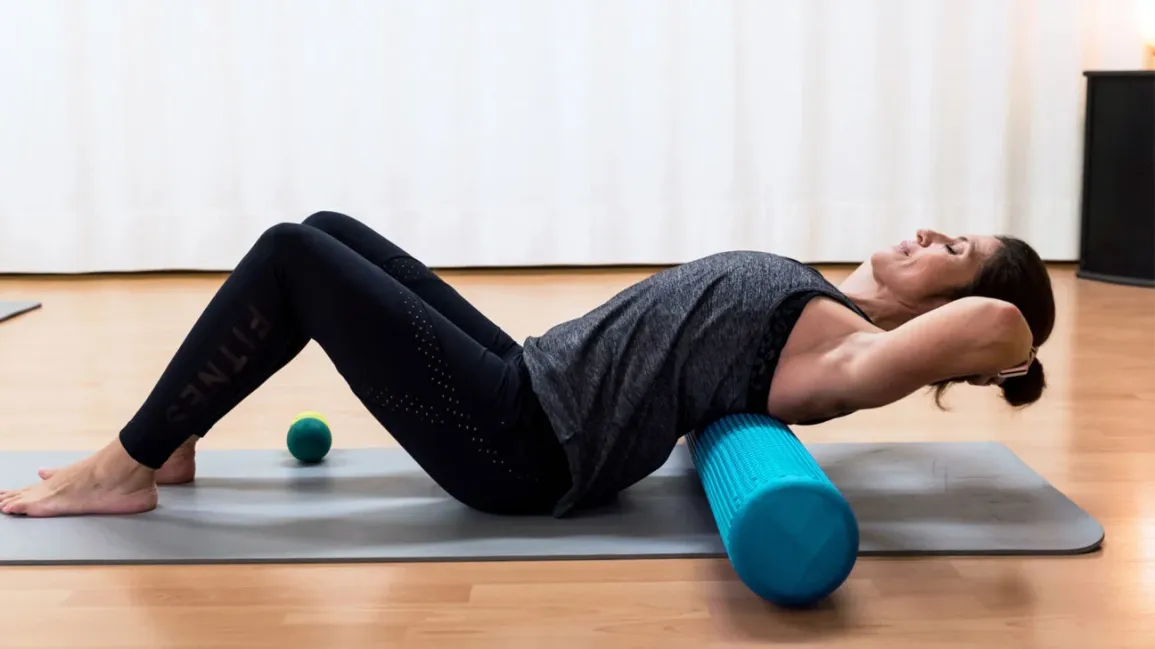
Upper Back Foam Rolling
To target the upper back muscles, follow these steps:
- Sit on the floor with the foam roller positioned horizontally behind you.
- Lean back onto the foam roller, supporting your weight with your hands placed behind you.
- Slowly roll the foam roller up and down your upper back, focusing on any tight or tender areas.
- Spend extra time on knots or trigger points to help loosen them up.
- Continue rolling for 1-2 minutes.
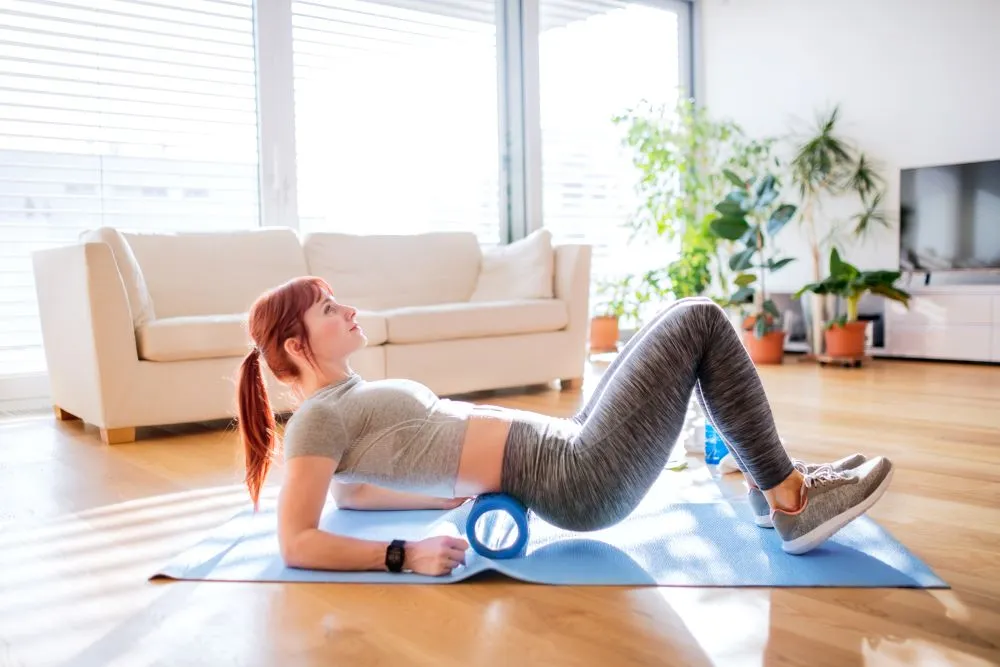
Lower Back Foam Rolling
To relieve tension in the lower back, try the following foam rolling technique:
- Lie on your back with your knees bent and feet flat on the floor.
- Place the foam roller underneath your lower back, just above your hips.
- Slowly roll the foam roller up and down along your lower back, focusing on any areas of tightness.
- If you find a tender spot, pause and apply gentle pressure until the tension starts to release.
- Continue rolling for 1-2 minutes.
Hamstring Foam Rolling
To target the hamstring muscles, follow these steps:
- Sit on the floor with your legs extended in front of you.
- Position the foam roller underneath your thighs, just above the back of your knees.
- Place your hands on the floor behind you for support.
- Slowly roll the foam roller up and down your hamstrings, from above the knees to the glutes.
- Pay attention to any tight or tender areas and spend extra time on those spots.
- Continue rolling for 1-2 minutes.
Quadriceps Foam Rolling
To release tension in the quadriceps muscles, try the following foam rolling technique:
- Lie facedown on the floor with the foam roller positioned horizontally underneath your thighs.
- Support your upper body with your forearms.
- Slowly roll the foam roller up and down your thighs, from above the knees to the hips.
- Focus on any tight or sore areas, pausing and applying pressure as needed.
- Continue rolling for 1-2 minutes.
Calf Foam Rolling
To target the calf muscles, follow these steps:
- Sit on the floor with your legs extended in front of you.
- Position the foam roller underneath your calves.
- Place your hands on the floor behind you for support.
- Slowly roll the foam roller up and down your calves, from above the ankles to below the knees.
- Pay attention to any tight or tender areas and spend extra time on those spots.
- Continue rolling for 1-2 minutes.
IT Band Foam Rolling
To release tension in the IT band, try the following foam rolling technique:
- Lie on your side with the foam roller positioned perpendicular to your body, just below your hip.
- Support your upper body with your forearm and place the opposite foot on the floor for stability.
- Slowly roll the foam roller down the side of your thigh, from your hip to just above your knee.
- If you find a tender spot, pause and apply gentle pressure until the tension releases.
- Continue rolling for 1-2 minutes on each side.
Glute Foam Rolling
To target the glute muscles, follow these steps:
- Sit on the foam roller with one ankle crossed over the opposite knee.
- Lean toward the side of the crossed leg and place your hands on the floor behind you for support.
- Slowly roll the foam roller over the glute muscles, focusing on tight or tender areas.
- If you find a knot or trigger point, pause and apply gentle pressure until the tension is releases.
- Continue rolling for 1-2 minutes on each side.
Shoulder Foam Rolling
To relieve tension in the shoulder muscles, try the following foam rolling technique:
- Stand facing a wall with the foam roller positioned vertically.
- Place the affected shoulder against the foam roller with your arm extended straight in front of you.
- Slowly roll the foam roller back and forth along the front of your shoulder, from the collarbone to the top of the arm.
- Pay attention to any tight or sore areas and spend extra time on those spots.
- Continue rolling for 1-2 minutes on each shoulder.
Chest Foam Rolling
To target the chest muscles, follow these steps:
- Lie facedown on the floor with the foam roller positioned horizontally underneath your chest.
- Support your upper body with your forearms.
- Slowly roll the foam roller up and down your chest, from the sternum to the shoulders.
- Focus on tight or sore areas, pausing and applying pressure as needed.
- Continue rolling for 1-2 minutes.
Hip Flexor Foam Rolling
To release tension in the hip flexor muscles, try the following foam rolling technique:
- Start in a plank position with the foam roller positioned horizontally underneath your hip flexors.
- Support your upper body with your forearms.
- Slowly roll the foam roller along the front of your hip flexors, from just below the hip bone to the upper thigh.
- Pay attention to any tight or tender areas and spend extra time on those spots.
- Continue rolling for 1-2 minutes.
Adductor Foam Rolling
To target the adductor muscles (inner thigh), follow these steps:
- Face down on the floor with the foam roller positioned vertically underneath your inner thigh.
- Support your upper body with your forearms.
- Slowly roll the foam roller up and down your inner thigh, from above the knee to the groin.
- Focus on tight or sore areas, pausing and applying pressure as needed.
- Continue rolling for 1-2 minutes on each leg.
Lateral Leg Foam Rolling
To release tension in the lateral leg muscles, try the following foam rolling technique:
- Lie on your side with the foam roller positioned vertically underneath your outer thigh.
- Support your upper body with your forearm and place the opposite foot on the floor for stability.
- Slowly roll the foam roller down the side of your thigh, from your hip to just above your knee.
- If you find a tender spot, pause and apply gentle pressure until the tension releases.
- Continue rolling for 1-2 minutes on each side.
Piriformis Foam Rolling
To target the piriformis muscle, which is located deep in the gluteal region, follow these steps:
- Sit on the foam roller with one ankle crossed over the opposite knee.
- Lean toward the side of the crossed leg and place your hands on the floor behind you for support.
- Tilt your body slightly to one side to target the piriformis muscle.
- Slowly roll the foam roller over the glute muscles, focusing on tight or tender areas.
- If you find a knot or trigger point, pause and apply gentle pressure until the tension releases.
- Continue rolling for 1-2 minutes on each side.

Neck Foam Rolling
To relieve tension in the neck muscles, try the following foam rolling technique:
- Lie on your back with the foam roller positioned vertically underneath your neck.
- Support your head with your hands, interlacing your fingers at the back of your head.
- Slowly roll the foam roller up and down your neck, from the skull’s base to the shoulders’ tops.
- Pay attention to any tight or sore areas and spend extra time on those spots.
- Continue rolling for 1-2 minutes.
Full Body Foam Rolling
If you want to incorporate foam rolling into a full-body routine, you can follow these steps:
- Start with the upper back foam rolling exercise described earlier.
- Move on to the lower back, hamstrings, quadriceps, and calves, using the techniques mentioned for each muscle group.
- Follow up with the IT band, glutes, shoulders, chest, hip flexors, adductors, lateral legs, piriformis, and neck foam rolling exercises.
- Spend 1-2 minutes on each muscle group, focusing on any areas of tightness or discomfort.
- Customize the routine based on your specific needs and target areas.
Tips for Effective Foam Rolling
To make the most out of your foam rolling sessions, consider the following tips:
- Start slowly: Begin with gentle pressure and gradually increase as your muscles become accustomed to the foam roller.
- Breathe deeply: Take deep breaths while foam rolling to promote relaxation and aid in releasing muscle tension.
- Focus on trigger points: Spend extra time on knots or trigger points in your muscles to help release them.
- Be consistent: Incorporate foam rolling into your regular routine to experience the benefits over time.
- Stay hydrated: Drink plenty of water before and after foam rolling to support muscle recovery and prevent dehydration.
- Combine with other recovery techniques: Foam rolling can be complemented with stretching, mobility exercises, and other recovery modalities for optimal results.
- Listen to your body: If a foam rolling technique causes excessive pain or discomfort, modify the pressure or seek guidance from a fitness professional.
Try foam roller exercises that target different muscle groups to integrate foam rolling into your fitness regimen effectively. For instance, rolling the right side with the foam roller can help release tension in the IT band, while placing the foam roller behind your back and rolling forth can alleviate tightness in the upper body. Lie down on the foam and roll to reach deeper into the muscle tissues.
FAQs – Foam rolling techniques for muscle soreness
Q: Can foam rolling help with delayed-onset muscle soreness?
A: Foam rolling can help alleviate delayed-onset muscle soreness (DOMS) by increasing blood flow to the muscles, reducing muscle tension, and promoting muscle recovery. While it may not eliminate all soreness, regular foam rolling can help minimize its intensity and duration.
Q: How often should I foam roll?
A: The frequency of foam rolling depends on your individual needs and goals. It can be done daily or a few times a week, depending on your activity level and recovery needs. Some individuals find it beneficial to foam roll before a workout as part of their warm-up routine, while others prefer to do it after exercise to aid in muscle recovery. Experiment with different frequencies and listen to your body to determine what works best for you.
Q: Can foam rolling help with flexibility?
A: Foam rolling can be used as a tool to improve flexibility and mobility. By targeting specific muscles and releasing tension, foam rolling can help increase the range of motion and enhance flexibility. Incorporating foam rolling into a dynamic stretching routine can be particularly effective in improving flexibility.
Q: Is foam rolling suitable for everyone?
A: Foam rolling can be beneficial for most individuals, but it’s important to use proper technique and consult with a healthcare professional if you have any underlying medical conditions or injuries. If you’re unsure about whether foam rolling is appropriate for you, it’s always a good idea to seek guidance from a qualified fitness professional or physical therapist.


